
Your orders are shipped right to your doorstep
We aim to exceed expectations by providing exceptional customer support.
Your payments are secure with our private security network.
Brand Name: Vogliovoi
Certification: ce,ROHS,CE,RoHs
Choice: yes
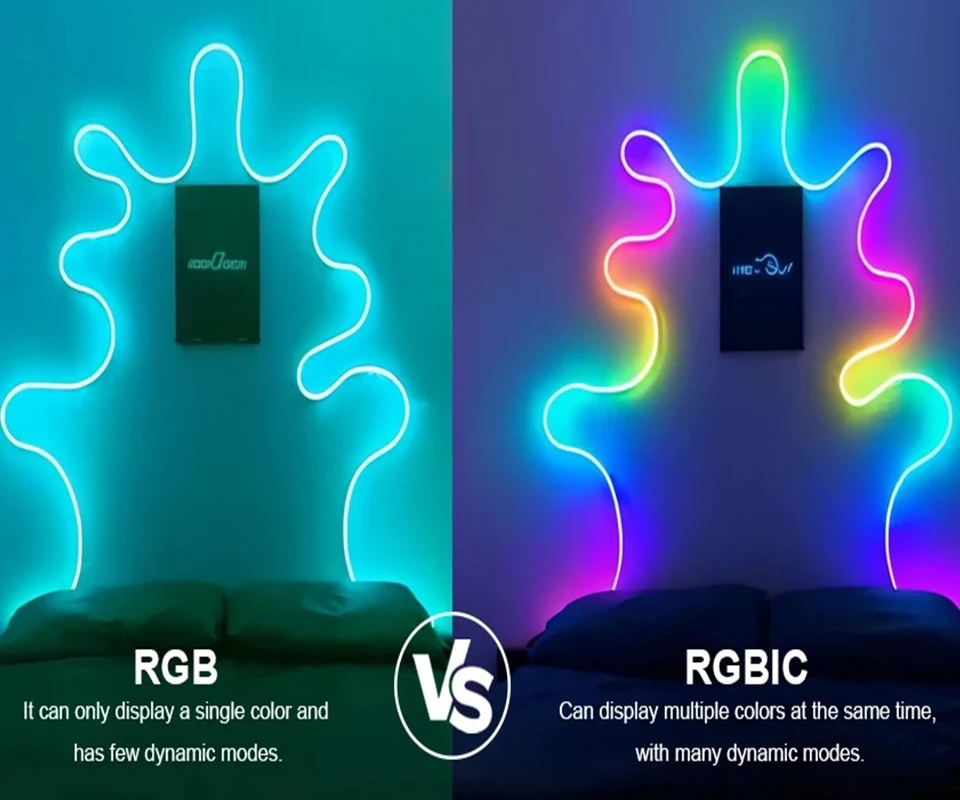
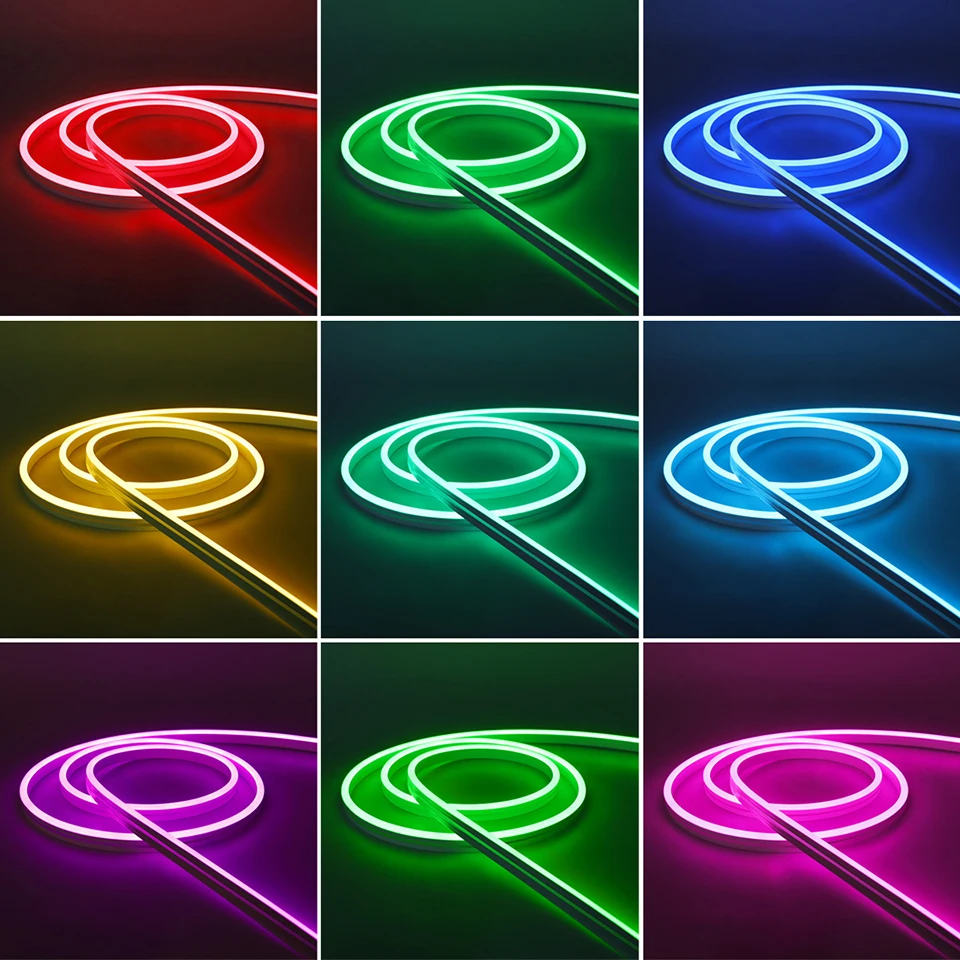
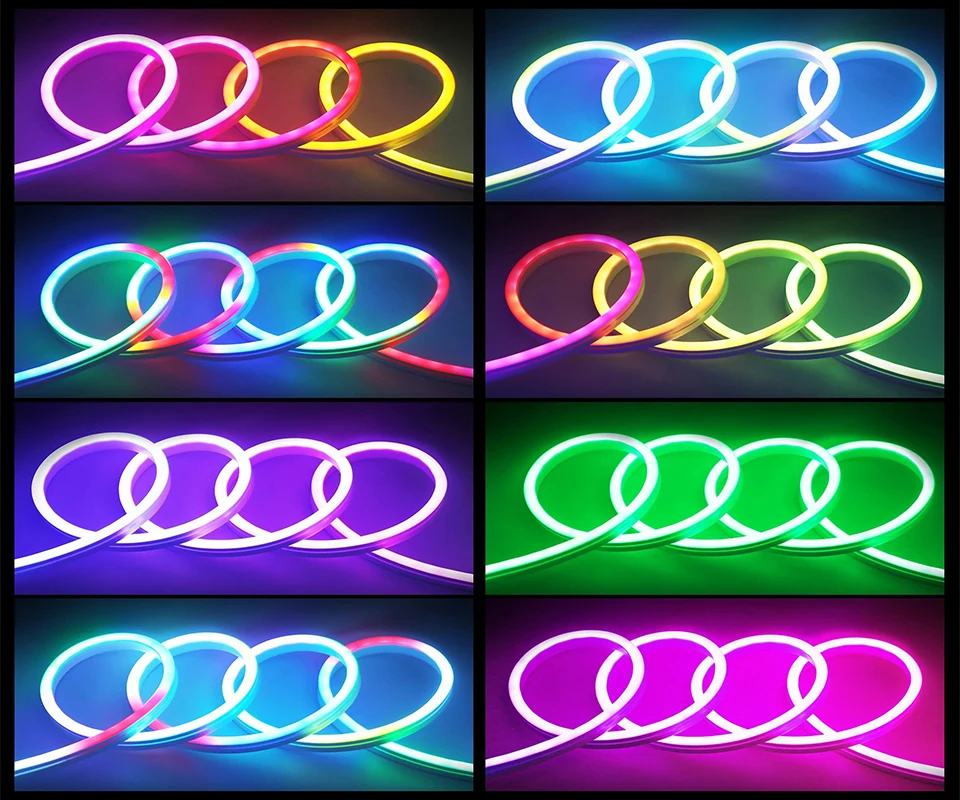
Color Temp(K): RGB / RGBIC
High-concerned chemical: None
Is Batteries Included: No
Is Smart Device: Yes
Item Type: Strip
LED Chip Brand: SANAN
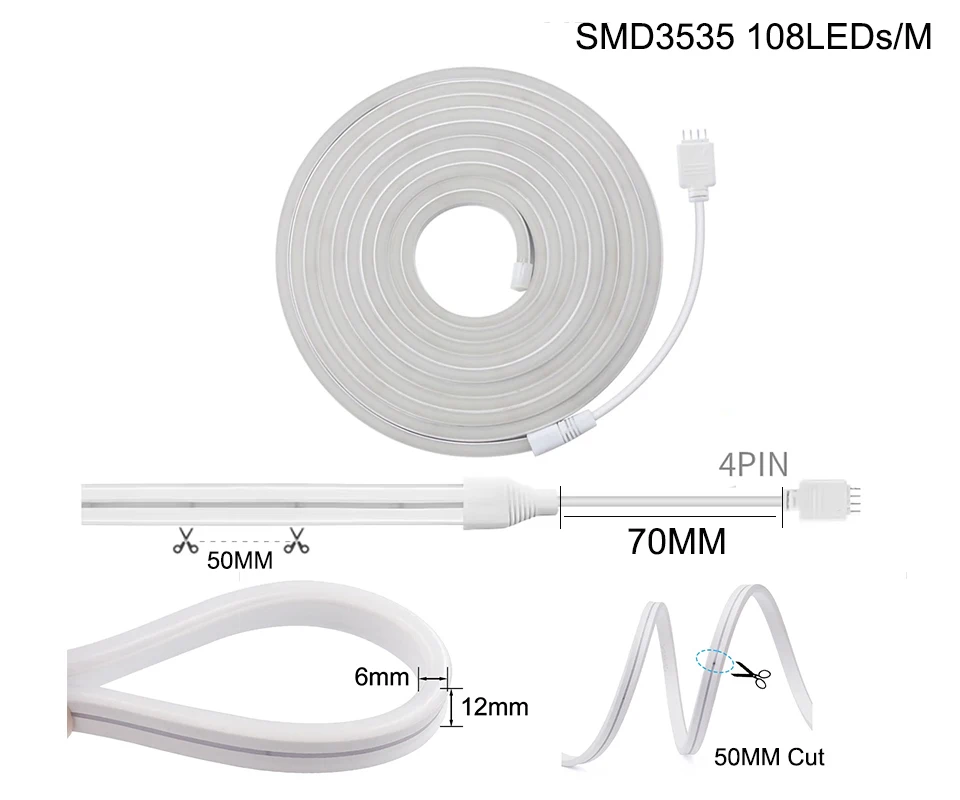
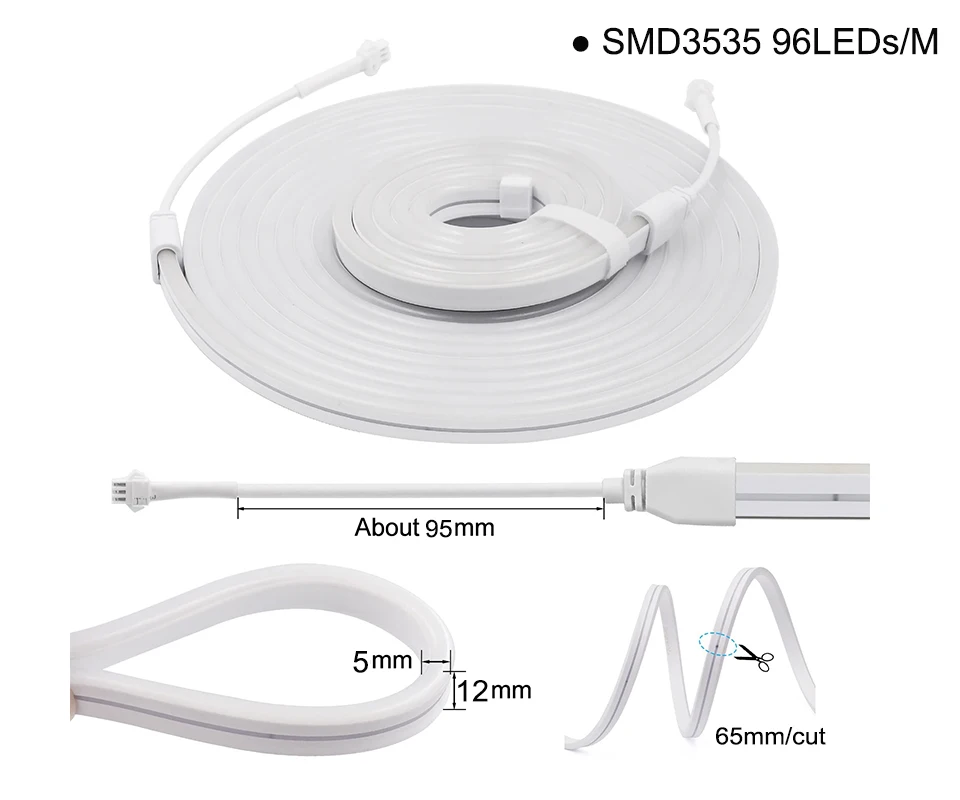
LED Chip Model: SMD3535
LEDs Number/M: 96 / 108
Luminous Flux: 60-249
Model Number: HS5050MH01
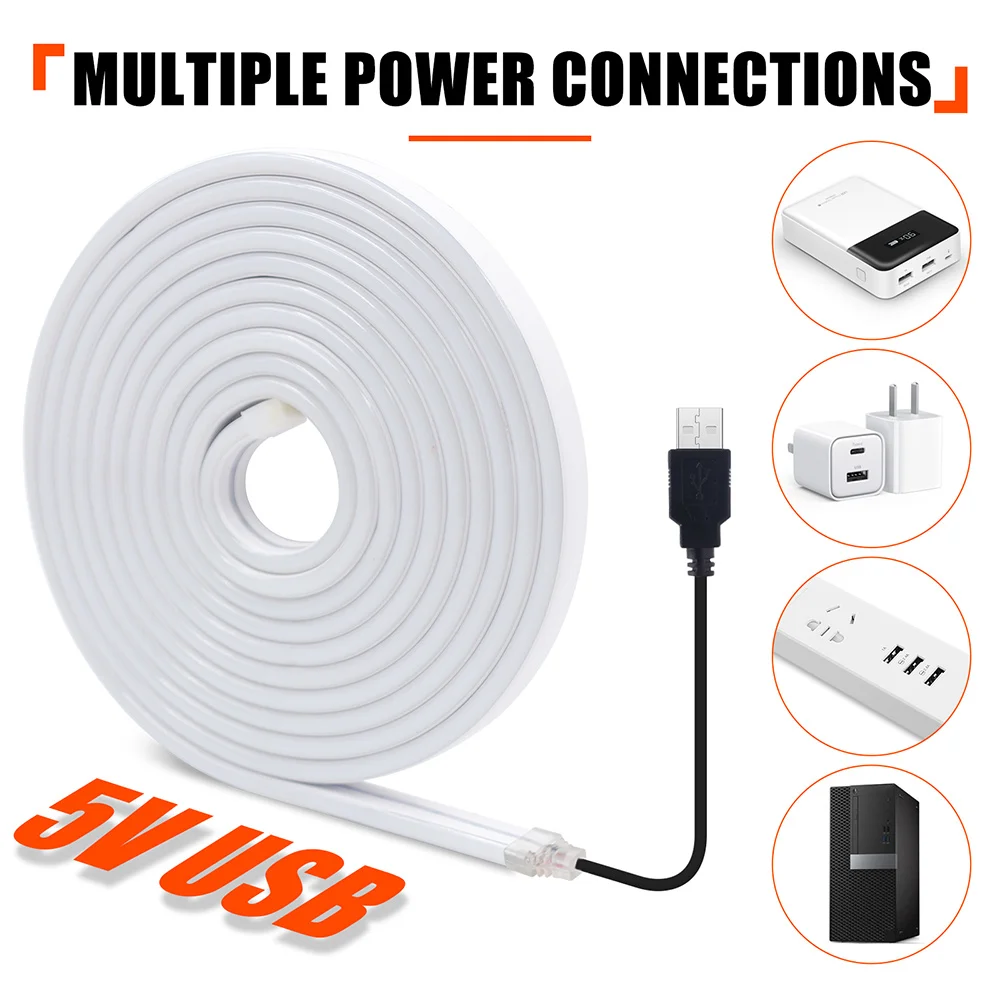
Nominal Voltage: 4.5V
Occasion: bedroom
Power Consumption (W/m): 7.36W/m
Power Generation: Switch
Power Source: DC
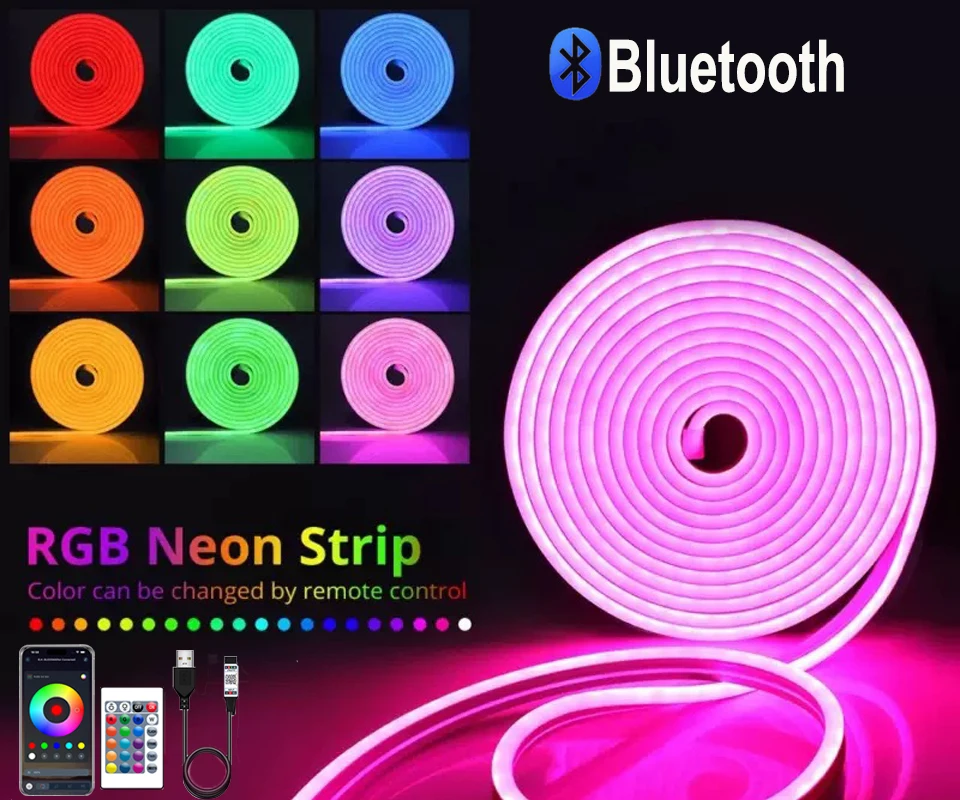
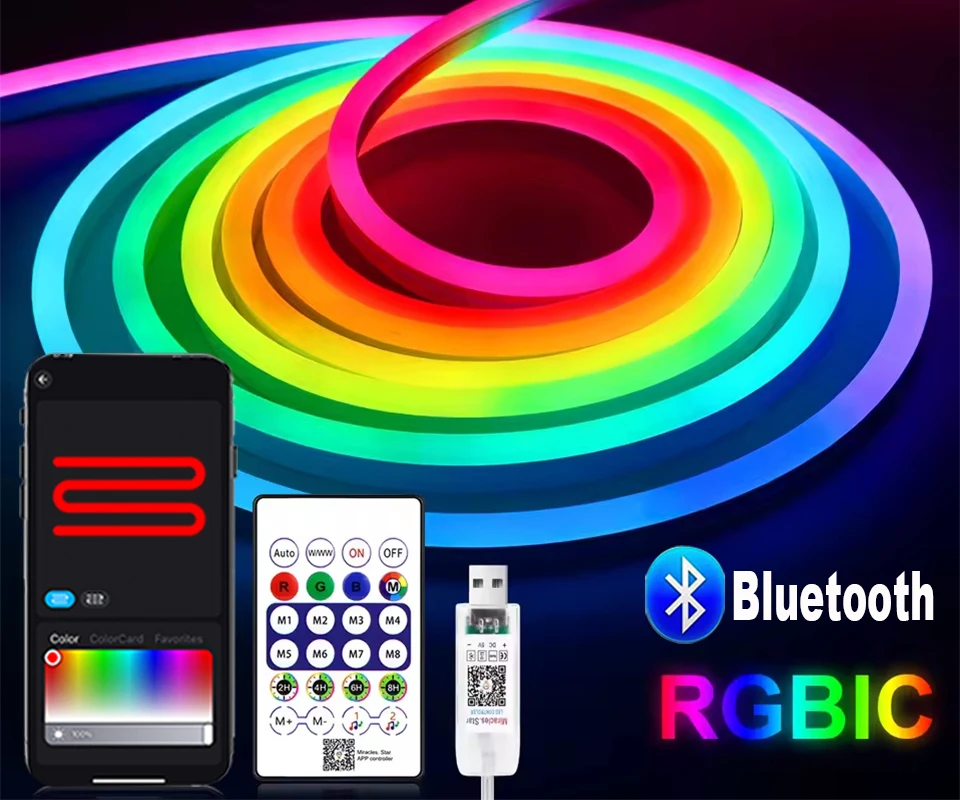
RGB 24Key Bluetooth APP: LotusLamp X
RGBIC 24Key Bluetooth APP: ZENGGE
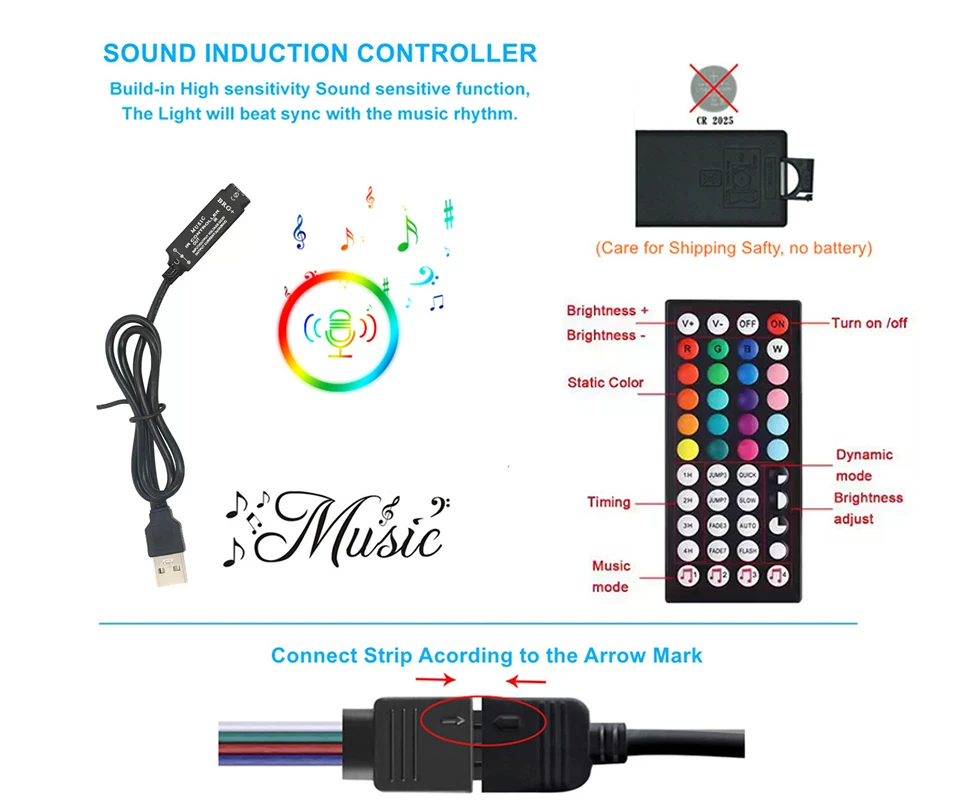
Remote Battery: CR2025 No Including
Specifications (light beads / m): 108
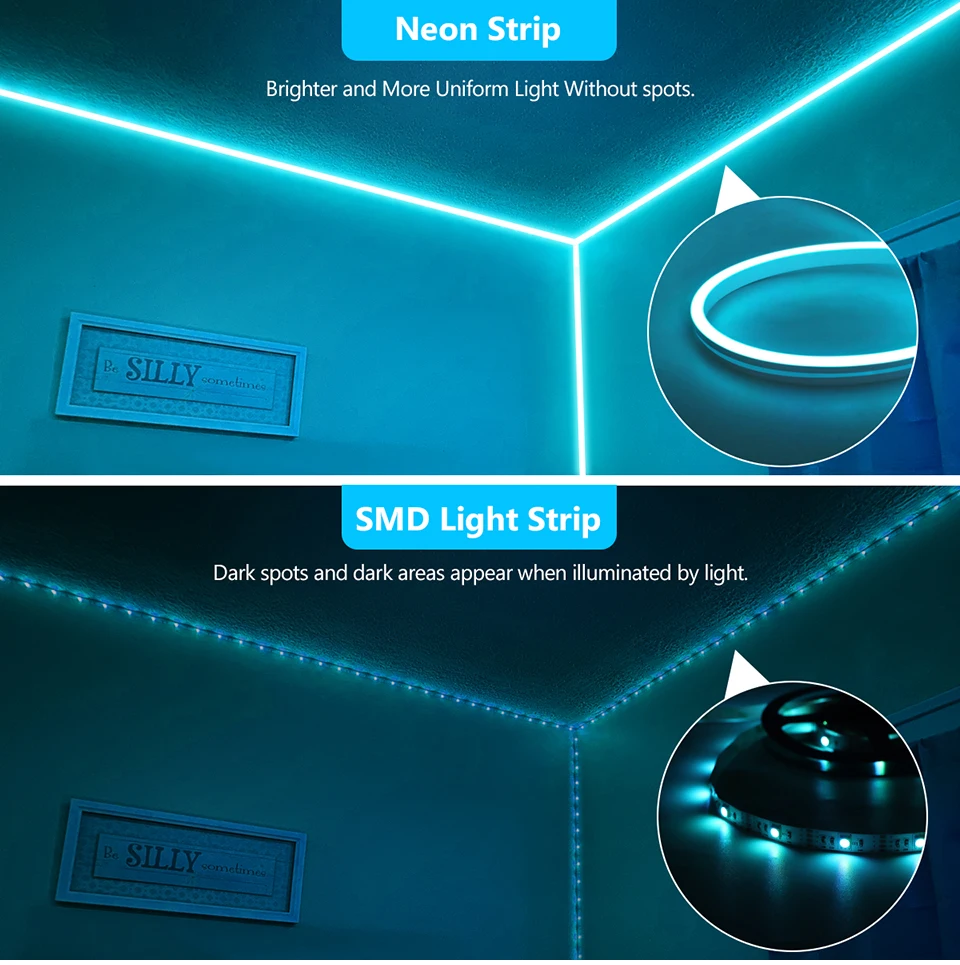
Strip type: SMD
Voltage: 5V
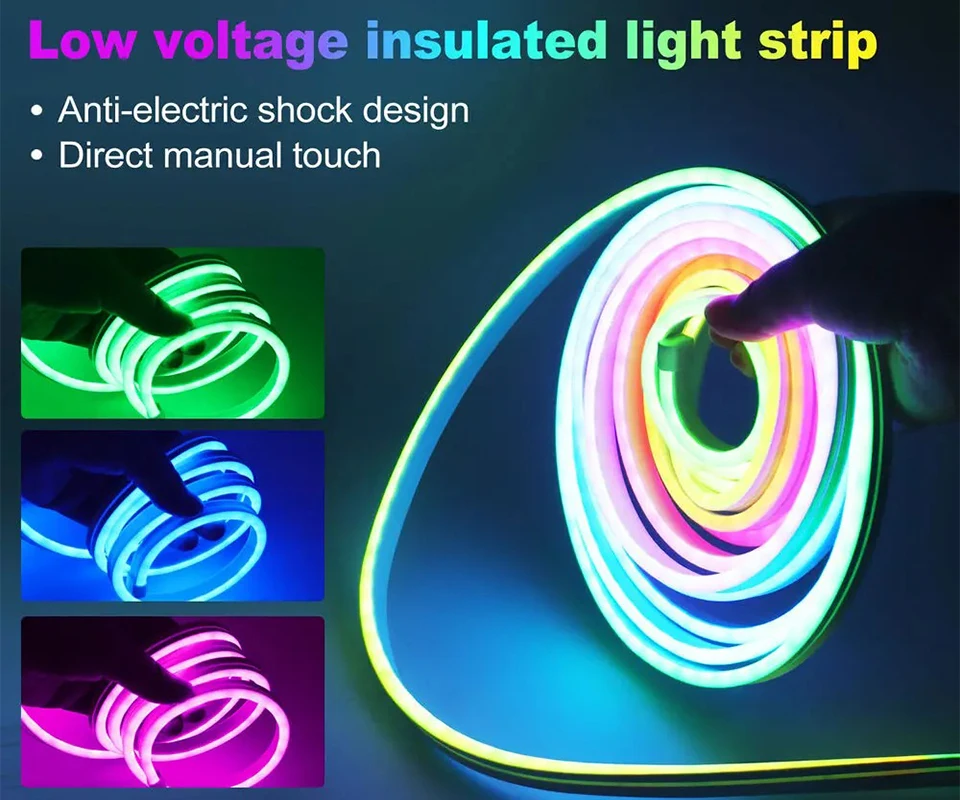
Waterproof: Yes
semi_Choice: yes
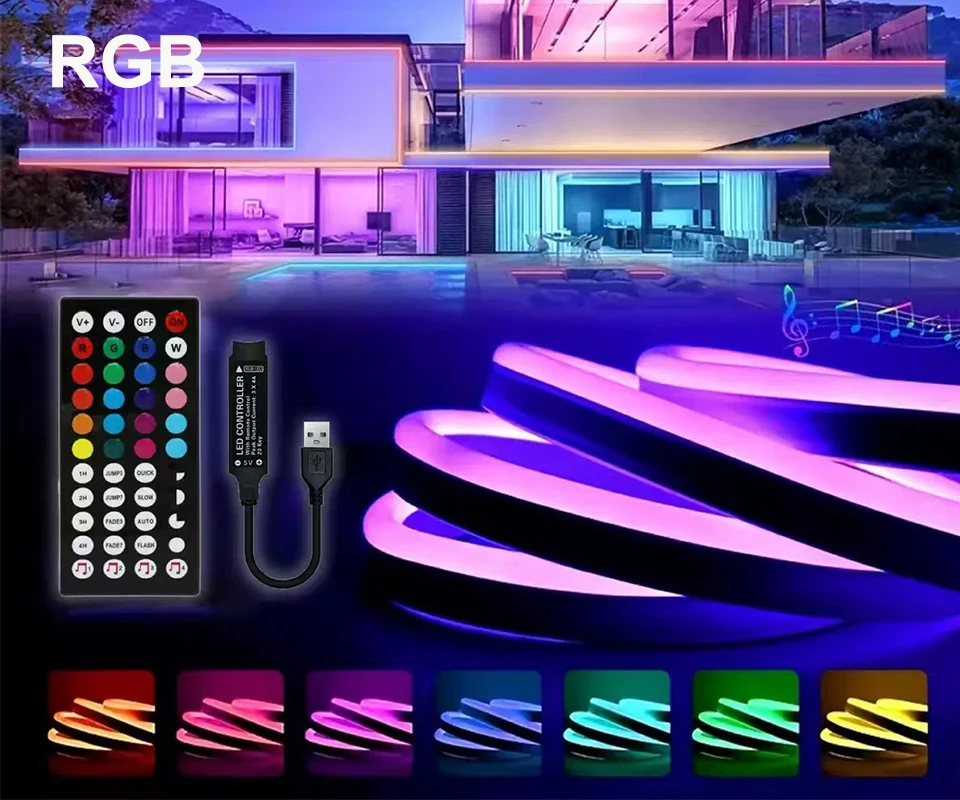
Type: RGBIC 24Key Bluetooth / RGB 24Key Bluetooth / RGB 44Key Music
Voltage: DC 5V (USB Power Supply)
LED Type: SMD 3535
Light Color: RGBIC / RGB
Strip Length: 3m / 5m
Remote Battery:CR2025 (No Including)
The product link includes 3 LED strip options:
RGB 44Key Music controller: RGB Neon Led Strip + Music controller+ 44 Key Infrared Remote controller. ( NO APP).
RGB 24Key Bluetooth controller:RGB Neon Led Strip + Bluetooth controller + 24Key Infrared Remote controller.(Can Use The Mobile App To Control The Neon Light Strip)
RGBIC 24Key Bluetooth controller:RGBIC Neon Led Strip + Bluetooth controller + 24Key Infrared Remote controller.(Can Use The Mobile App To Control The Neon Light Strip)
Package List:
3M=3M/Roll Neon Strip+1*USB Controller+1*Remote Controller
5M=5M/Roll Neon Strip+1*USB Controller+1*Remote Controller
Note: The white light of RGB / RGBIC light strips is composed of three colors: red, green, and blue, which differ from pure white light


Common problems of strip lights
Why do some light beads not light up or the entire group of light beads (3 lights per group) not light up after installing the light strip?
Pulling and pulling the light strip forcefully during installation is the cause of its damage. 1. The solder joints may loosen, crack, or even completely fall off. Reason 2: Internal copper foil breakage. Excessive pulling can cause the copper foil to be stretched, thinned, or even broken.
How to operate correctly and avoid pulling and damaging?
1. Handle gently: When holding the light strip, hold the strip itself, not just the wires. If you need to move a longer light strip, it is best for two people to cooperate.
2. Side by side placement: During installation, especially when using adhesive backing, do not tear off the entire roll of light strip adhesive at once. You should first tear open a small section, stick it in place, and then gradually tear and fix it, allowing the light strip to naturally adhere to the installation surface and avoid tension.
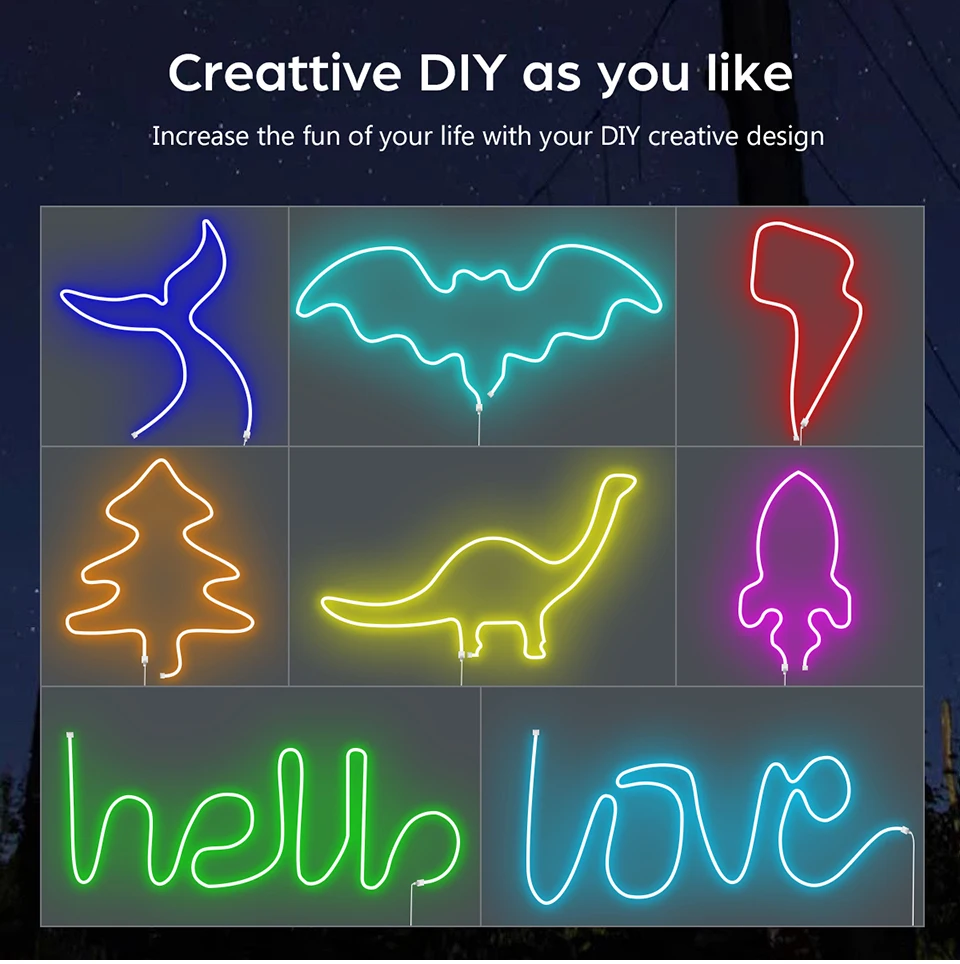
3. Avoid “straightening”: If the light strip is bent, it should be placed naturally along its curvature, and do not forcefully straighten it to achieve a straight effect. If a straight installation is required, the path should be planned in advance to allow the light strip to be smoothly laid over.
4. Use auxiliary tools: When installing over long distances or complex paths, you can use light strip card slots, fixed buckles, etc. First, fix the card slots, and then easily insert the light strip, which can greatly avoid pulling and pulling during installation.
The most reliable method is to conduct a power-on test before finally securing all the light strips and power supplies. If a certain section is found to be non-functional, the problem is likely to be in the area where it was pulled or stretched.Please unfold the LED light strip before you power it up to avoid overheating of the LED lights. This can lengthen the lifespan of the product.
What if I accidentally pull it and cause damage?
Use the accessories we provide. we have a sharing link or you can consult us
Common problems in group settings
How to add a device to a group?
Please follow the steps below:
1.First connect the device to the App successfully and keep it online:
2.All devices are displayed in the device list onthe App home page;
3. Long press the device icon, select the deviceyou want to group(two or more), and in thepop-up menu,select “Create Group”.
4.On the Create Group page, devices of thesame device type are displayed,and onlydevices of the same device type can begrouped into the same group, select the room,and then click “Next”.
5.Name the group and select the icon, thegroup name must be within 20 characters
6.Click”Finish”,it automatically return to themain page of the App. Check all devices orclick to open the group in the collapsed menuof the device to check whether the creation is successful.
| Emitting Color | RGB 44K Music, RGBIC 24K Bluetooth, RGB 24K Bluetooth |
|---|---|
| Color | Waterproof |
| Wattage | Remote no battery |
| Length | 5M, 3M |
| Ships From | China Mainland |


Reviews
There are no reviews yet.